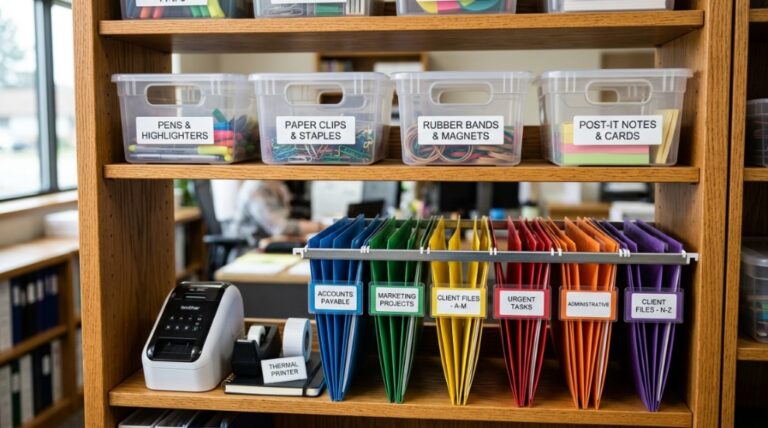





Does your workspace feel more like a storage unit than a command center? When papers pile up, cables tangle, and sticky notes multiply, your brain pays the price. Every misplaced pen or lost document chips away at your focus, making it harder to get into a flow state. Fortunately, you don’t need a complete office renovation to fix this. Instead, a thoughtful, practical approach to decluttering can transform your desk into a space that supports deep work. This guide walks you through a step-by-step process to organize your desk for productivity, covering everything from the initial purge to the small habits that keep things tidy long-term.
Why a Cluttered Desk Kills Your Focus
It is not just about looks. In fact, a cluttered desk actively competes for your attention. Your visual cortex processes everything in your field of view, so when that field is full of unrelated objects, your brain has to work harder to filter out the noise. As a result, this constant, low-level distraction reduces your working memory and makes it harder to concentrate on complex tasks. Studies in environmental psychology consistently show that physical clutter increases mental strain and can raise stress levels, even if you think you have tuned it out.
Beyond the mental impact, clutter also creates friction. When you need a specific document or tool, you have to stop, search, and shuffle. This breaks your momentum, and each interruption costs you valuable time to refocus. By creating a designated place for everything and clearing your primary work surface, you reduce decision fatigue and make it easier to start working. Ultimately, the goal is to create a system where your environment supports your intentions rather than working against them.
Step 1: The Complete Desk Purge
Before you can organize, you first have to subtract. Start by removing every single item from your desk and drawers. This step is non-negotiable, since you need a blank canvas to see what you are actually working with. Place everything in a pile on a table or the floor. This process forces you to evaluate each item individually rather than letting things slide just because they have always been there.
Once everything is out, sort your items into four distinct categories:
- Keep: Items you use daily or weekly for your core work.
- Relocate: Items that belong elsewhere, like dishes, personal items, or reference books that could live on a shelf.
- Archive: Documents and files you need to keep for legal or historical reasons but do not need at your fingertips.
- Discard: Trash, broken items, and things you simply do not need anymore.
Be honest with yourself during this step. That stack of old receipts or the collection of pens that no longer work are just taking up valuable space. If you haven’t used an item in the last three months and it is not seasonal, it is probably a candidate for relocation or discard. This initial purge is the most important step overall, because it creates the physical space necessary for a working system.
Step 2: Zone Your Desk for Workflow
Once you have reduced your belongings to the essentials, it is time to assign them a logical home. The most effective desk layouts are based on zones. Instead of placing items randomly, you create specific areas for specific types of work. This reduces the time you spend searching and helps your brain associate different parts of the desk with different tasks. A well-zoned desk allows you to organize your desk for productivity by minimizing unnecessary movement and keeping your primary focus area clear.
Consider these three primary zones:
- Primary Zone (Center): This is your main work area. It should hold only your monitor, keyboard, mouse, and perhaps a notepad for quick notes. This area needs to stay clear to allow for focused work.
- Secondary Zone (Dominant Hand Side): Place items you use often but not constantly here. This includes your phone, a pen holder, sticky notes, and a small desk calendar. Keeping these within arm’s reach but out of your direct line of sight prevents distraction.
- Reference Zone (Non-Dominant Hand Side): This area is for items you need to check occasionally, like a reference book, a document tray for current projects, or a desk lamp. As a result, this zone keeps resources accessible without cluttering your main workspace.
Managing Cables and Power
Untangling the physical and visual dissonance of stray cords is a foundational prerequisite for a high-performance workspace, as exposed wiring quietly erodes both focus and aesthetic refinement. Begin by disconnecting all peripherals, marking individual lines with precise identification tags to guarantee seamless reconfiguration, and anchoring them discreetly via under-desk routing trays, woven sleeves, or minimalist clips to eliminate slack. Concealing bulky power strips and excess cord lengths within a sleek management enclosure instantly elevates the workstation into a polished, executive-tier environment entirely free of visual noise. Building upon this baseline of structural order, shift your focus to surface curation by clearing the desktop entirely and wiping down the surface before staging only absolute essentials—such as your primary device, keyboard, and an active notebook. Establish strict, intentional boundaries for active deliverables versus archival storage by leveraging vertical architectural space or bespoke drawer dividers, ensuring your core writing zone remains unobstructed and primed for deep cognitive work. To maintain precise categorization across your storage bins and file folders as you refine these zones, consult our guide on pick a label maker for office in WA to select the ideal hardware for your workflow. Sustaining this disciplined, minimalist configuration permanently eliminates daily friction, safeguarding your mental clarity for high-leverage execution.
Step 3: Choosing the Right Desk Organizers

Not all organizers are created equal. The best ones are the ones that fit your specific workflow. So, before buying anything, measure your desk and your drawers. A large organizer that does not fit your space will simply become clutter itself. Instead, think about what you need to store and choose tools that match the size and shape of those items. For example, a deep drawer works well for vertical file organizers, while a shallow tray is better suited for a keyboard and mouse.
When selecting organizers, prioritize function over form. For instance, a simple, sturdy tray for incoming and outgoing paperwork is more useful than a decorative but impractical one. You might also consider using vertical space with a monitor stand that includes a small drawer or shelf underneath. This can hold pens, sticky notes, and other small items without taking up extra desk surface. Ultimately, the key is to create a home for every category of item you decided to keep during the purge step.
Step 4: The Paperwork System
Paper is often the biggest source of desk clutter. The most effective way to manage it is to set up a simple three-tray system: Inbox, Action, and Archive. The Inbox holds new documents that need your attention. The Action tray holds items you are actively working on. Meanwhile, the Archive tray is for documents that need to be filed away but you haven’t gotten to yet. Together, this system creates a clear workflow and keeps papers from piling up in random stacks.
Make a habit of processing your inbox daily. This means going through the tray and deciding what to do with each piece of paper: act on it, delegate it, file it, or toss it. This daily review takes only a few minutes but prevents the backlog from growing. For documents you need to keep long-term, scan them and store them digitally instead. Doing so reduces physical clutter and makes it easier to search for information later. In fact, a paperless approach is the ultimate solution for a permanently clear desk.
Step 5: Daily and Weekly Reset Habits
An organized desk is not a one-time event; rather, it is a system that requires upkeep. The most successful approach is to build small, consistent habits. At the end of each workday, take two minutes to reset your desk: put pens back in their holder, file away loose papers, and wipe down the surface. This “shutdown ritual” signals to your brain that the workday is over and prepares your space for a fresh start tomorrow.
On a weekly basis, do a more thorough review. Clear out your inbox, archive or shred documents you no longer need, and check for any items that have drifted onto your desk from other parts of the house. This weekly maintenance prevents the slow creep of clutter, so you avoid needing a major overhaul later. Overall, this consistent upkeep is what keeps your desk a productive environment.
Frequently Asked Questions
What is the best way to organize a small desk?
For a small desk, prioritize vertical storage. Use a monitor stand to create space underneath, mount your monitor on an arm to free up the entire surface, and use wall-mounted shelves or pegboards for items you need within reach. Overall, the goal is to keep the primary work surface clear by moving everything else up or out.
How often should I clean and reorganize my desk?
You should do a quick two-minute tidy-up at the end of each workday to reset the space. In addition, a more thorough decluttering and reorganizing session should happen weekly or bi-weekly to clear out paperwork and deal with anything that has piled up. Finally, a full deep-clean and system review can be done quarterly.
Should I use a standing desk for better productivity?
Standing desks can improve focus and energy levels for some people, but they are not a magic fix. Instead, the productivity benefit mostly comes from reducing the physical discomfort of sitting for long periods. So, if you choose a standing desk, make sure it has a good cable management system and a clear plan for organizing your equipment, just as you would with a traditional desk.
What are the most common desk organization mistakes?
The most common mistakes are buying organizers before decluttering, keeping too many items on the desk surface, and failing to build a daily reset habit. Another frequent error is using organizers that are too large, which encourages filling them with unnecessary items. Always measure your space and your needs before buying any storage solution.
Conclusion
Organizing your desk is an investment in your own focus and well-being. By starting with a complete purge, zoning your space for your specific workflow, and choosing the right tools, you can create an environment that makes it easier to do your best work. Ultimately, the key is not perfection but consistency. So, implementing simple daily and weekly habits will help your desk stay a functional, calm space that supports your goals. Start with the purge today, and you will immediately feel the difference in your ability to concentrate and get things done.